OMERO.web administration
OMERO.web is the web application component of the OMERO platform which allows for the management, visualization (in a fully multi-dimensional image viewer) and annotation of images from a web browser. It also includes the ability to manage users and groups.
Reading through OMERO.web installation first is recommended.
Note that the command bin/omero used throughout this page refers to OMERO.py/bin/omero if OMERO.web is deployed separately otherwise it refers to OMERO.server/bin/omero.
Logging in to OMERO.web
Once you have deployed and started the server, you can use your browser to access the OMERO.webclient:
- http://your_host/omero OR, for development server: http://localhost:4080
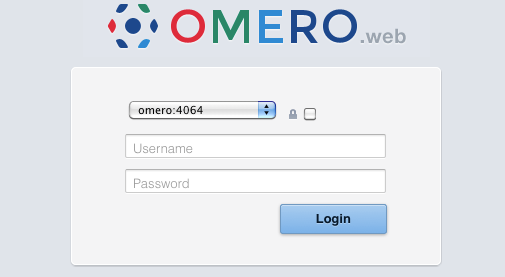
OMERO.web login
OMERO.web maintenance
If an attempt is made to access OMERO.web whilst it is not running, the generated NGINX configuration file will automatically display a maintenance page.
Session cookies omero.web.session_expire_at_browser_close:
A boolean that determines whether to expire the session when the user closes their browser. See Django Browser-length sessions vs. persistent sessions documentation for more details. The default value is True:
$ bin/omero config set omero.web.session_expire_at_browser_close "True"
The age of session cookies, in seconds. The default value is 86400:
$ bin/omero config set omero.web.session_cookie_age 86400
Clear session:
Each session for a logged-in user in OMERO.web is kept in the session store. Stale sessions can cause the store to grow with time. OMERO.web uses by default the OS file system as the session store backend and does not automatically purge stale sessions, see Django file-based session documentation for more details. It is therefore the responsibility of the OMERO administrator to purge the session cache using the provided management command:
$ bin/omero web clearsessions
It is recommended to call this command on a regular basis, for example as a daily cron job, see Django clearing the session store documentation for more information.
Customizing your OMERO.web installation
OMERO.web offers a number of configuration options. The configuration changes will not be applied until gunicorn is restarted using bin/omero web restart.
- Session engine:
OMERO.web offers alternative session backends to automatically delete stale data using the cache session store backend, see Django cached session documentation for more details.
Redis 2.8+ requires django-redis 4.4+ in order to be used with OMERO.web. We assume that Redis has already been installed. The django-redis package is now installed as part of the OMERO.web deployment. To configure the cache, run:
$ bin/omero config set omero.web.caches '{"default": {"BACKEND": "django_redis.cache.
RedisCache", "LOCATION": "redis://127.0.0.1:6379/0"}}'
After installing all the cache prerequisites set the following:
$ bin/omero config set omero.web.session_engine django.contrib.sessions.backends.cache
Use a prefix:
By default OMERO.web expects to be run from the root URL of the webserver. This can be changed by setting omero.web.prefix and omero.web.static_url. For example, to make OMERO.web appear at http://example.org/omero/:
$ bin/omero config set omero.web.prefix '/omero'
$ bin/omero config set omero.web.static_url '/omero/static/'
and regenerate your webserver configuration (see Prerequisites).
Use a different host:
The front-end webserver e.g. NGINX can be set up to run on a different host from OMERO.web. You will need to set omero.web.application_server.host to ensure OMERO.web is accessible on an external IP.
All configuration options can be found on various sections of Web developers documentation. For the full list, refer to Web properties or:
$ bin/omero web -h
The most popular configuration options include:
- Debug mode, see omero.web.debug.
- Customizing OMERO clients e.g. to add your own logo to the login page (omero.web.login_logo) or use an index page as an alternative landing page for users (omero.web.index_template). See OMERO.web UI customization for further information.
- Enabling a public user see Publishing data using OMERO.web.
Setting up CORS
Cross Origin Resourse Sharing allows web applications hosted at other origins to access resources from your OMERO.web installation. This can be achieved using the django-cors-headers app with additional configuration of OMERO.web. See the django-cors-headers page for more details on the settings.
Install the app and add it to the list of installed apps:
$ pip install django-cors-headers
$ bin/omero config append omero.web.apps '"corsheaders"'
Add the cors-headers middleware. Configuration of OMERO.web middleware was added in OMERO 5.3.2 and uses an ‘index’ to specify the ordering of middleware classes. It is important to add the CorsMiddleware as the first class and CorsPostCsrfMiddleware as the last, for example:
$ bin/omero config append omero.web.middleware '{"index": 0.5, "class": "corsheaders.middleware.CorsMiddleware"}'
$ bin/omero config append omero.web.middleware '{"index": 10, "class": "corsheaders.middleware.CorsPostCsrfMiddleware"}'
Specify which origins are allowed access:
$ bin/omero config set omero.web.cors_origin_whitelist '["hostname.example.com"]'
Or allow access from all origins:
$ bin/omero config set omero.web.cors_origin_allow_all True

Page Contents
OMERO
Downloads by versionDocumentation by version
Features
Licensing
Previous topic
Next topic
Quick search
Enter search terms or a module, class or function name.