OMERO.server installation
See also
- OMERO.server upgrade
- Instructions for upgrading your OMERO.server installation.
Limitations
Installation will require an “Administrator” level account for which you know the password. If you are unsure of what it means to have an “Administrator” level account, or if you are generally having issues with the various users/passwords described in this install guide, please see Which user account and password do I use where?.
Unless you are clear on the differences, you should also open all consoles as an administrator to prevent file permission issues.
Significant testing has taken place on Windows Server 2008 and we recommend this version.
OMERO.movie is not supported on Windows at present.
A reboot is required after installing the prerequisites.
Note
The default user paths on Windows usually contain spaces so you will need to ensure the the server installation path has no spaces, C:\OMERO.server for example.
Prerequisites
Note
The installation of these prerequisite applications is largely outside the scope of this document.
Do not mix 32bit (x86) and 64bit (amd64) packages - install either all 32bit or all 64bit. Check your JRE as well.
The following are necessary:
Java SE Development Kit (JDK)
Java SE Downloads are available from http://www.oracle.com/technetwork/java/javase/downloads/index.html. Java 7 is recommended, Java 6 is supported.
Ice
Note
OMERO 5.0 supports Ice 3.5, 3.4 and 3.3. Ice 3.3 support is deprecated and will be removed in OMERO 5.1, which will require Ice 3.5 or 3.4. You will need to pick the matching server download for the version of Ice you have installed.
If you are using precompiled packages of Ice and Python (recommended) you should use the versions specified below. In particular since OMERO does not support Python 3 it will not work with the ZeroC Ice 3.5 package for Windows. However, Ice 3.5 will work when built against Python 2.7.
Windows installers of Ice 3.4 can be found on the ZeroC Ice 3.4.2 download page. Alternatively, you can now download Ice 3.5.1 built against Python 2.7 from our Ice downloads page (please let us know if you encounter any issues - this has passed initial tests but further testing is needed before we can confidently recommend it over Ice 3.4 for Windows).
If you plan to develop for C++, be sure to read the instructions on the OMERO C++ language bindings page.
Python 2
Note
OMERO does not currently support Python 3.
Make sure you install the correct Python 2 version for your Ice version:
- If you have installed Ice version 3.4.2 from ZeroC, you need Python version 2.6 which you can download from Python 2.6.6 release downloads.
- If you have downloaded Ice 3.5.1 from our downloads page, you will need to install the latest Python 2.7 release.
As these are the “vanilla” python distributions (no extra libraries), you will need to install further dependencies, making sure to download the correct version (2.6/2.7, 32/64-bit) for your Python distribution.
32/64-bit
OMERO has been extensively tested with 32-bit Python on Windows. 64-bit Python should also work though it has not been tested as thoroughly. You can obtain 64-bit precompiled dependencies from http://www.lfd.uci.edu/~gohlke/pythonlibs.
Python for Windows extensions
Python for Windows extensions (PyWin32) is required. The installer is available from the PyWin download page.
The version you need is: pywin32-XXX.win32-pyA.B.exe (or pywin32-XXX.win-amd64-pyA.B.exe for 64-bit Python) where XXX should be the latest release number and A and B stand for the Python version, for example pywin32-218.win32-py2.6.exe.
Additional libraries
The following are optional depending on what services you require:
| Package | Functionality | Downloads |
|---|---|---|
| Pillow | OMERO.web and Figure Export | Pillow page |
| Matplotlib | OMERO.web | Matplotlib page |
| NumPy (1.2.0 or higher) [1] | Scripting | Numpy/Scipy page |
| PyTables (2.1.0 or higher) | OMERO.tables | PyTables page |
| scipy.ndimage | Volume Viewer [2] | Numpy/Scipy page |
| [1] | May already have been installed as a dependency of Matplot Lib. |
| [2] | Allows larger volumes to be viewed in the Volume Viewer. |
PostgreSQL (8.4 or higher)
PostgreSQL has to be installed and configured with PL/pgSQL and to accept TCP connections. PostgreSQL 8.3 and earlier are not supported. 9.2 or later is recommended.
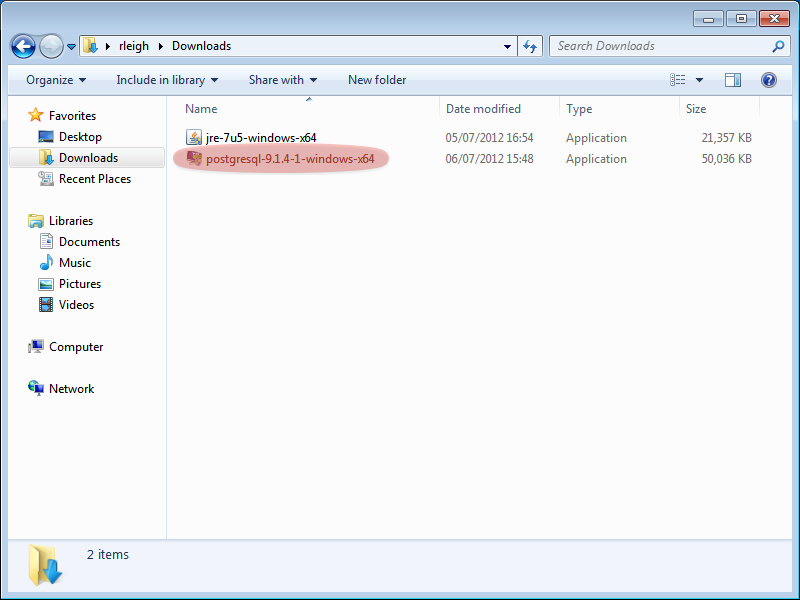
The One click installer can be found on the PostgreSQL Windows download page. You will need the postgres user’s password later in the install.
- You must install PostgreSQL as a service if you want to follow this document; other PostgreSQL installation environments are supported but are outside the scope of this document.
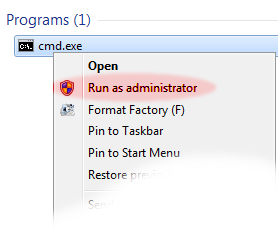
Run the downloaded installer:
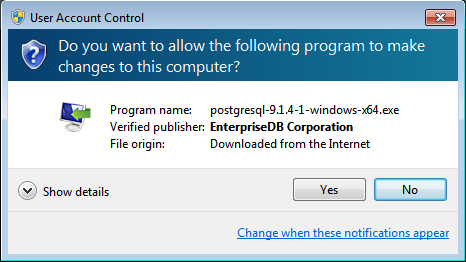
You may be prompted for permission to continue with a “user account control” dialog. Click yes to continue.
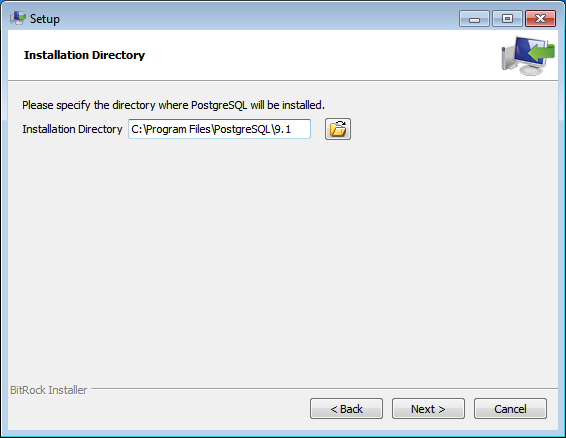
The installer will now start.

Choose the installation directory. The default is fine.
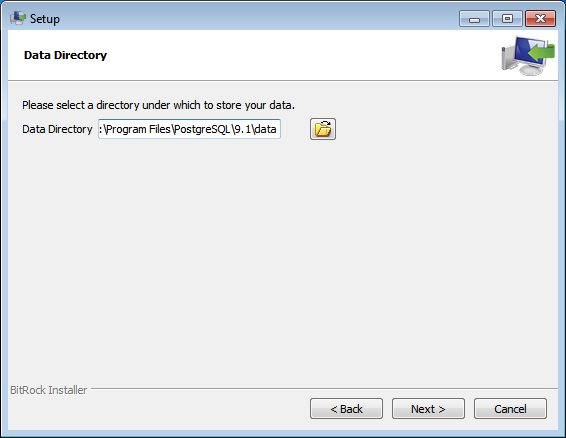
Choose the data directory. The default is fine, but if you want to keep the data in a specific location, you may choose an alternative location here.
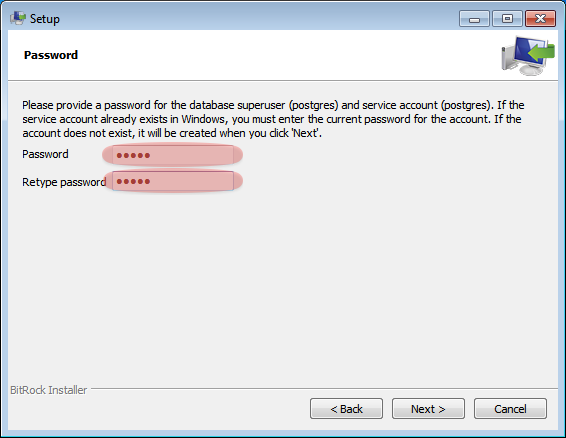
Enter a password for the special “postgres” system account. OMERO does not use this account, but you will need to remember the password for creating the database, below.
Enter the port number for PostgreSQL to listen on for incoming connections. The default, 5432, is fine and should not be changed.

Select the locale. The default here is fine.

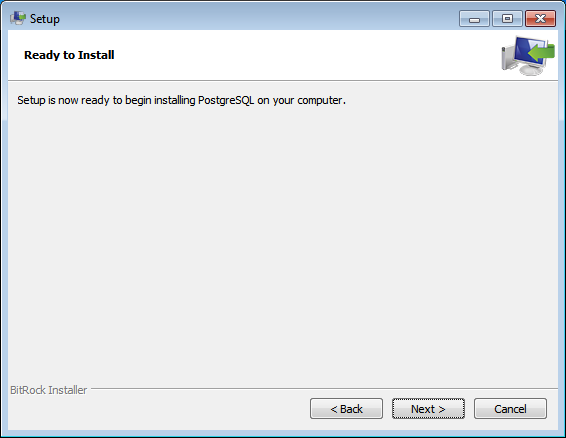
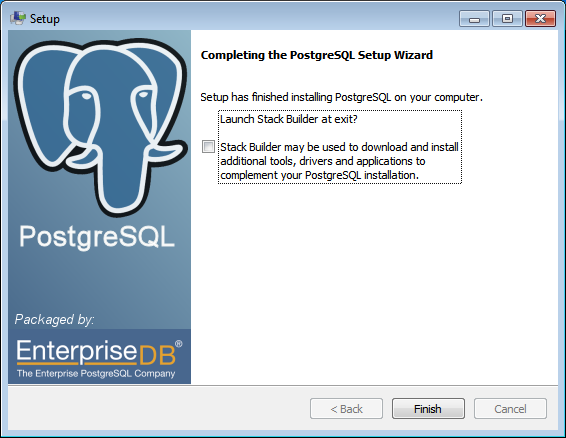
PostgreSQL will now be installed and started.
Environment variables
For the prerequisite software to run properly, your PATH and PYTHONPATH environment variables must be configured. This is particularly important for Ice, which does not set the required variables by default.
Update your Windows environment variables: (REQUIRES RESTART!)
Locate the System control panel page on the Start Menu under Settings ‣ Control Panel, open it and navigate to the Advanced tab (on Windows Vista the dialog will be visible after clicking the Change settings link on the System control panel page):
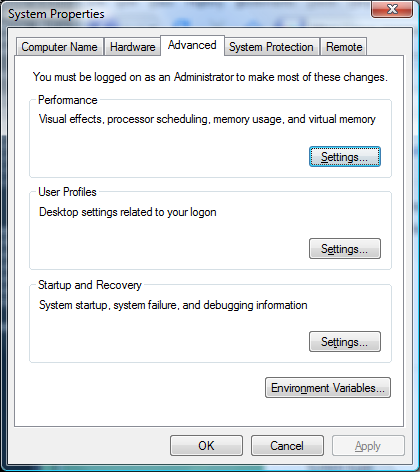
Advanced System Properties
Open the Environment Variables dialog by clicking on the Environment Variables... button of the above dialog:
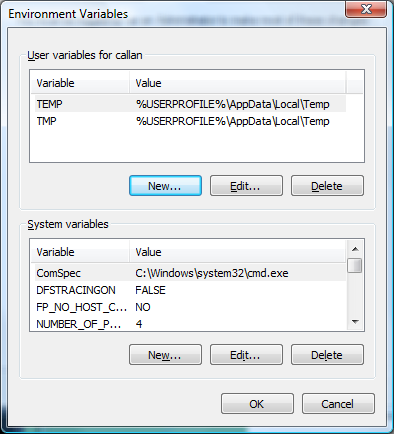
Environment Variables
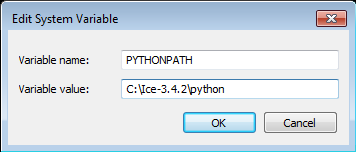
Edit the existing System environment variable Path and add a new variable pointing to the Ice installation bin directory. At the front of the Path variable also add a new string pointing to the Python installation directory (e.g. C:\Python26). Then add a brand new System environment variable called PYTHONPATH pointing to the Ice installation python location:

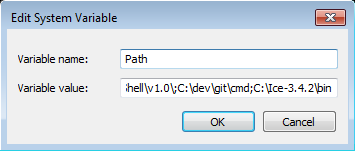
When setting the ENV variables, make sure you write in the correct paths. You must have entries for:
- python (the first PATH entry, e.g. “C:\Python26;%Sys…)
- icebin (the last PATH entry, e.g. “…;C:\Ice-3.4.2\bin;”)
- PYTHONPATH pointing to the python folder in the ICE installation (e.g. “C:\Ice-3.4.2\python;”)
- For 64-bit you will need to use the 64-bit Ice directories, for example “C:\Ice-3.4.2\bin\x64;” and “C:\Ice-3.4.2\python\x64;”.
Warning
Remember that the Windows path separator is the semicolon ; and must be appended after every entry.
Make sure the first inserted ENV PATH entry (the python path) finishes with a semicolon (eg. “C:\Python26;%SystemRoot%…”) otherwise you could corrupt other system applications.
Restart your computer. For environment changes to take effect in background services, a restart is unfortunately necessary. See http://support.microsoft.com/kb/821761 for more information.
Creating a database for OMERO
Probably the most important step towards having a working server system is having a properly configured database.
Create a non-superuser database user (make sure to note down the name and password) using pgAdmin III. You can find pgAdmin III on the Start Menu under Programs ‣ PostgreSQL 9.1 ‣ pgAdmin III:
Double-click on the PostgreSQL 9.1 database (or right- click and choose Connect) and provide your postgres user login password set during the installation, above.

Connect to the database server

Enter password
Right-click on Login Roles and select New Login Role...
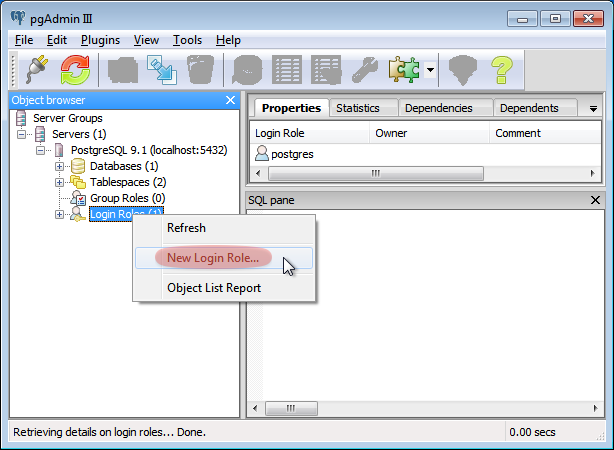
New login role
Create a new role and record the name and password. You will need to configure OMERO to use your username and password by setting the omero.db.name and omero.db.pass properties.
Warning
For illustrative purposes, the default name and password for the role are db_user and db_password respectively. However, you should not use these default values for your installation but use your own choice of username and password instead.

Setting name of new login role

Setting password of new login role
Create an omero_database database:
Right-click on Databases and select New Database ...
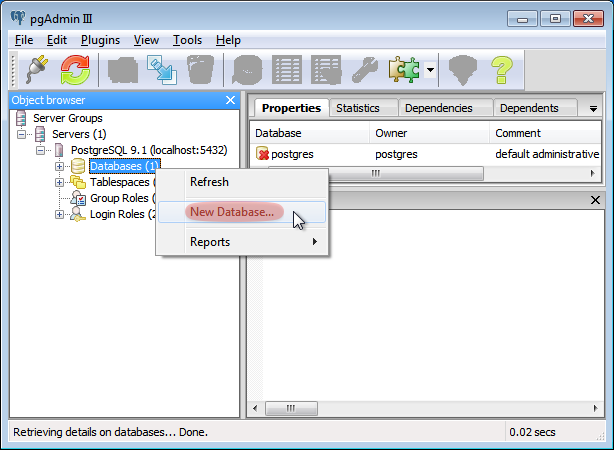
New database
Create a new database with the Name omero_database and Owner db_user (this may take a few moments)
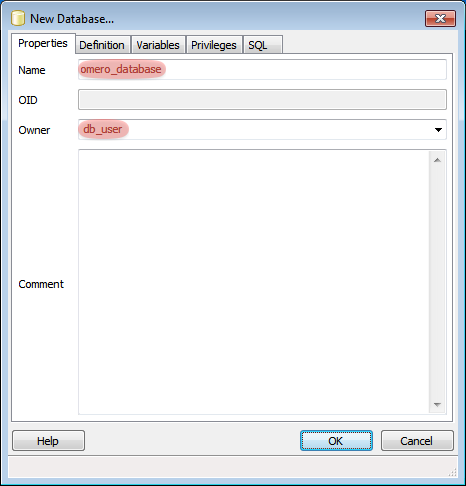
New database name
Confirm PL/pgSQL language support in your newly created database
First, go to File ‣ Options select the Browser tab and activate the Languages option:
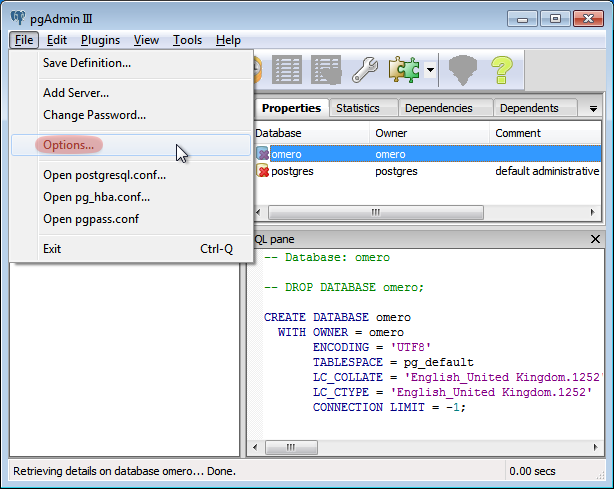
Options menu
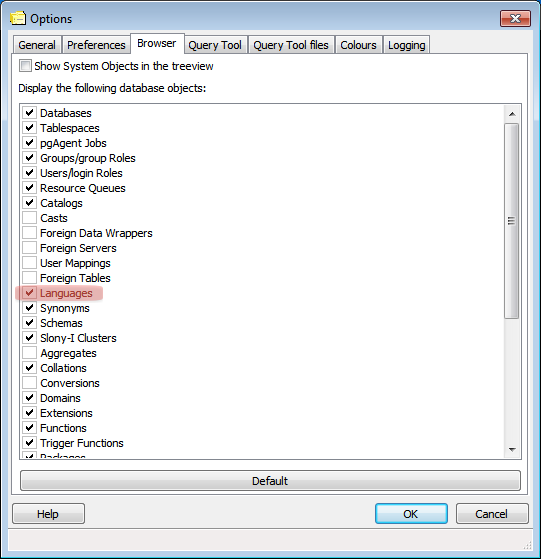
Enable display of installed languages
Navigate back to your database, expand the database’s tree view and finally expand the now available Languages item:

View installed languages
If the plpgsql language is missing, right-click on the Extensions item and select the New extension... option in the menu. Finally, add the plpgsql extension, accepting all defaults. This will add both the extension and the language. In older PostgreSQL versions without extensions, right-click on the Languages item and select the New language... option in the menu. Finally, add the plpgsql language, accepting all defaults.
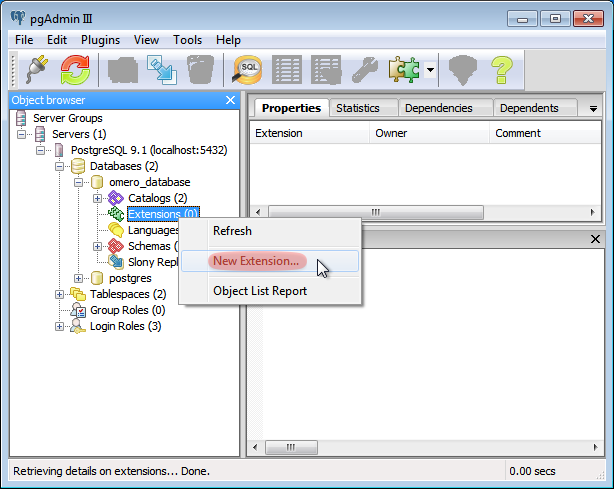
Add new language
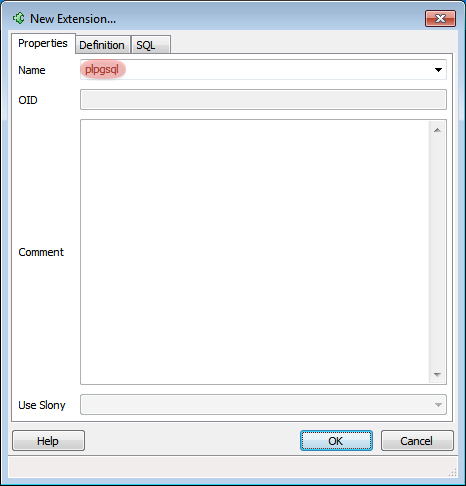
New language name
Location for your OMERO binary repository
See also
Create a directory for the OMERO binary data repository (C:\OMERO is the default location and should be used unless you explicitly have a reason not to and know what you are doing).
This is not where you want the OMERO application to be installed, it is a separate directory that OMERO.server will use to store binary data:
C:\mkdir OMERO
Change the ownership of the directory. C:\OMERO must either be owned by the user starting the server or that user must have permission to write to the directory. Please see OMERO.server binary repository for more details.
When performing some operations the clients make use of temporary file storage and log directories. By default these files are stored below the user’s home directory (on Windows C:\Users\<username>) in omero\tmp, omero\log and omero\sessions.
Note
If your home directory is stored on a network (NFS mounted or similar), then file read and write operations occur over the network. This can slow access down. Installing OMERO on a network mapped drive is strongly discouraged.
The OMERO.server also accesses the omero\tmp and omero\log folders of the user account running the server process. As the server makes heavier use of these folders than the clients, if that user’s home folder is stored on a network the server can be slowed down. To get around this for the OMERO.server you can define an OMERO_TEMPDIR environment variable pointing to a temporary directory located on the local file system e.g. C:\tmp\.
Installation
Download and extract the OMERO.server zip file, and note its location. Below it is referred to as C:\OMERO.server.
Optionally, review Configuration properties glossary, which contains all default settings. Any configuration settings you would like to change can be changed in the next step.
Change any settings that are necessary using bin\omero config, including the name and/or password for the ‘db_user’ database user you chose above or the database name if it is not “omero_database”. (Quotes are only necessary if the value could be misinterpreted by the shell. See link).
C:\> cd C:\OMERO.server
C:\OMERO.server\> bin\omero config set omero.db.name omero_database
C:\OMERO.server\> bin\omero config set omero.db.user db_user
C:\OMERO.server\> bin\omero config set omero.db.pass db_password
If you have chosen a non-standard OMERO binary repository location above, be sure to configure the omero.data.dir property.
When using C:\ style file paths it is necessary to “escape” the backslashes. For example:
C:\> bin\omero config set omero.data.dir C:\\OMERO
Create the OMERO database initialization script. You will be asked for the version of the script which you would like to generate, where both defaults can be accepted. Finally, you will be asked to enter and confirm password for your newly created OMERO root user.
Warning
For illustrative purposes, the default password for the OMERO rootuser is root_password. However, you should not use this default value for your installation but use your own choice of password instead.
This should not be the same password as your Linux/Mac/Windows root user!
C:\> cd C:\OMERO.server
C:\OMERO.server> bin\omero db script
Please enter omero.db.version [OMERO5.0]:
Please enter omero.db.patch [0]:
Please enter password for new OMERO root user: # root_password
Please re-enter password for new OMERO root user: # root_password
Saving to C:\OMERO.server\OMERO5.0__0.sql
The generated SQL file is found in the folder where you called the “omero db script” command. This could cause a permission denied error in the populate db step if the postgres user cannot access that location. Move the file to a different location or use the -f option.
Initialize your database with the script.
Launch SQL Shell (psql) from the Start Menu under Programs ‣ PostgreSQL 9.1 ‣ SQL Shell (psql)
Server [localhost]:
Database [postgres]: omero_database
Port [5432]:
Username [postgres]: db_user
Password for user db_user:
Welcome to psql 9.1.4, the PostgreSQL interactive terminal.

Type:  copyright for distribution terms
        h for help with SQL commands
        ? for help with psql commands
        g or terminate with semicolon to execute query
        q to quit

Warning: Console code page (437) differs from Windows code page
         (1252) 8-bit characters might not work correctly. See psql
         reference page "Notes for Windows users" for details.
Execute the following to populate your database (the forward slashes are intentional - if you get a permission denied error it is because the path is wrong, not the slashes):
omero=> \i C:/OMERO.server/OMERO5.0__0.sql
...
...
omero=> \q
Before starting the OMERO.server, you should run the OMERO diagnostics script so that you check that all of the settings are correct, e.g.
C:\OMERO.server\> bin\omero admin diagnostics
The diagnostic tool may say that psql is not found. This should not be a problem but you can fix it by adding its bin folder to the path. For example, C:\Program Files (x86)\PostgreSQL\9.2\bin. Remember to reboot after changing the environment.
You can now start the server using:
C:\OMERO.server> bin\omero admin start
Creating C:\OMERO.server\var\master
Creating C:\OMERO.server\var\registry
No descriptor given. Using etc\grid\windefault.xml
Installing OMERO.master Windows service.
Successfully installed OMERO.master Windows service.
Starting OMERO.master Windows service.
Waiting on startup. Use CTRL-C to exit
...
If you have chosen a non-default install directory (other than C:\OMERO.server), the output will look like this:
C:\OMERO.server> bin\omero admin start
Found default value: C:\OMERO.server\var\master
Attempting to correct...
Converting from C:\OMERO.server to C:\OMERO.server
Changes made: 6
No descriptor given. Using etc\\grid\\windefault.xml
...
If you would like to move the directory again, see bin\winconfig.bat --help, which gets called automatically on an initial install.
You can now test that you can log-in as “root”, either with the OMERO.insight client or command-line:
C:\OMERO.server> bin\omero login
Server: [localhost]
Username: [root]
Password:         # root_password
JVM memory settings
The OMERO server starts a number of Java services. Memory settings for these are calculated on a system-by-system basis. An attempt has been made to have usable settings out of the box, but if you can afford to provide OMERO with more memory, it will certainly improve your overall performance. See Memory configuration on how to tune the JVM.
OMERO.web and administration
Note
In order to deploy OMERO.web in a production environment such as IIS please follow the instructions under OMERO.web deployment.
Otherwise, the internal Django webserver can be used for evaluation and development. In this case, you need to turn debugging on, in order that static files can be served by Django:
C:\OMERO.server> bin\omero config set omero.web.application_server development
C:\OMERO.server> bin\omero config set omero.web.debug True
then start by
c:\OMERO.server> bin\omero web start
INFO:__main__:Application Starting...
INFO:root:Processing custom settings for module omeroweb.settings
...
Validating models...

0 errors found
Django version 1.6, using settings 'omeroweb.settings'
Starting development server at http://0.0.0.0:4080/
Quit the server with CTRL-BREAK.
Note
As OMERO.web 5 is based on Django 1.6, omero.web.session_engine and omero.web.cache_backend should be unset.
C:\omero_dist>bin\omero config set omero.web.session_engine
C:\omero_dist>bin\omero config set omero.web.cache_backend
If your deployment requires additional cache store please follow Django documentation for more details.
Once you have deployed and started the server you can use your browser to access the OMERO.web interface:
-
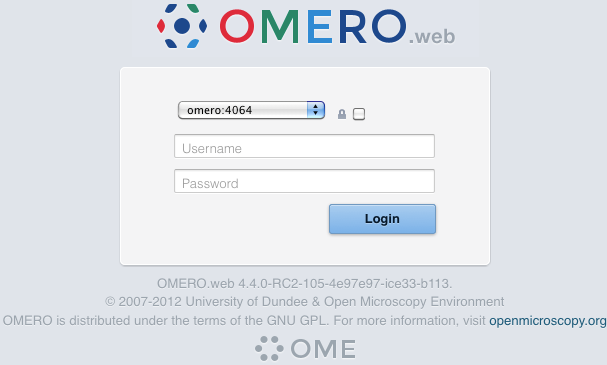
OMERO.webadmin login
Post-installation items
Backup
One of your first steps after putting your OMERO server into production should be deciding on when and how you are going to backup your database and binary data. Please do not omit this step.
Security
You should read the Server security and firewalls page to get a good idea as to what you need to do to get OMERO clients speaking to your newly installed OMERO.server in accordance with your institution or company’s security policy.
Advanced configuration
Once you have the base server running, you may want to try enabling some of the advanced features such as OMERO.dropbox or LDAP authentication. If you have *Flex data*, you may want to watch the HCS configuration screencast. See the Feature list for more advanced features you may want to use, and Configuration properties glossary on how to get the most out of your server.
Troubleshooting
If you encounter a problem which is not addressed by the Troubleshooting OMERO page, you can post a message to our ome-users mailing list as discussed on the Community support page. Especially the Server fails to start and Remote clients cannot connect to OMERO installation sections are a good starting point.
OMERO diagnostics
Please include the output of the diagnostics command when asking for help with your server installation:
C:\opt\OMERO.server> bin\omero admin diagnostics

================================================================================
OMERO Diagnostics 5.0.8
================================================================================


Commands:   java -version                  1.8.0     (C:\Program Files\Java\jdk1.7.0_51\bin\java.EXE -- 2 others)
Commands:   python -V                      2.7.6     (C:\Python27\python.EXE -- 2 others)
Commands:   icegridnode --version          3.5.1     (c:\opt\Ice-3.5.1-win-x64-Release\bin\icegridnode.EXE)
Commands:   icegridadmin --version         3.5.1     (c:\opt\Ice-3.5.1-win-x64-Release\bin\icegridadmin.EXE)
Commands:   psql --version                 9.3.4     (C:\Program Files\PostgreSQL\9.3\bin\psql.EXE)

Server:     icegridnode                    running
Server:     Blitz-0                        active (pid = 1384, enabled)
Server:     DropBox                        inactive (disabled)
Server:     FileServer                     inactive (disabled)
Server:     Indexer-0                      active (pid = 3872, enabled)
Server:     MonitorServer                  inactive (disabled)
Server:     OMERO.Glacier2                 active (pid = 5744, enabled)
Server:     OMERO.IceStorm                 active (pid = 3520, enabled)
Server:     PixelData-0                    active (pid = 3096, enabled)
Server:     Processor-0                    inactive (disabled)
Server:     Tables-0                       inactive (disabled)
Server:     TestDropBox                    inactive (enabled)
Server:     OMERO.master                   active (running as LocalSystem)

OMERO:      SSL port                       4064
OMERO:      TCP port                       4063

Log dir:    C:\opt\OMERO.server-5.0.1-ice35-b21\var\log exists

Log files:  Blitz-0.log                    38.0 KB
Log files:  DropBox.log                    n/a
Log files:  FileServer.log                 n/a
Log files:  Indexer-0.log                  64.0 KB       errors=0    warnings=2

Log files:  MonitorServer.log              n/a
Log files:  OMEROweb.log                   n/a
Log files:  PixelData-0.log                3.0 KB        errors=0    warnings=2

Log files:  Processor-0.log                n/a
Log files:  Tables-0.log                   n/a
Log files:  TestDropBox.log                n/a
Log files:  master.err                     1.0 KB        errors=2    warnings=2

Log files:  master.out                     0.0 KB
Log files:  Total size                     0.11 MB


Environment:OMERO_HOME=(unset)
Environment:OMERO_NODE=(unset)
Environment:OMERO_MASTER=(unset)
Environment:OMERO_TEMPDIR=(unset)
Environment:PATH=C:\Program Files\PostgreSQL\9.3\bin;C:\Python27;c:\opt\Ice-3.5.1-win-x64-Release\bin;C:\Program Files\Java\jdk1.7.0_51\bin;C:\Windows\system32;C:\Windows;C:\Windows\System32\Wbem;C:\Windows\System32\WindowsPowerShell\v1.0\
Environment:ICE_HOME=c:\opt\Ice-3.5.1-win-x64-Release
Environment:LD_LIBRARY_PATH=(unset)
Environment:DYLD_LIBRARY_PATH=(unset)

OMERO data dir: 'C:\\opt\\omerodata'    Exists? True    Is writable? True
OMERO temp dir: 'C:\Users\omero\AppData\Roaming\omero\tmp'     Exists? True
Is writable? True   (Size: 0)
OMERO.web status... [NOT STARTED]
Update notification
Your OMERO.server installation will check for updates each time it is started from the Open Microscopy Environment update server. If you wish to disable this functionality you should do so now as outlined on the OMERO upgrade checks page.