Note
This documentation is for OMERO 5.2. This version is now in maintenance mode and will only be updated in the event of critical bugs or security concerns. OMERO 5.3 is expected in the first quarter of 2017.
OMERO demo server
Take advantage of the OMERO platform and ask for a free demo account.
To register for a free demo account, please visit the registration page.
We will contact you and provide you with a server name, username and password, please be patient as it may take a few days to process your application after we receive it.
If you have already requested a demonstration account:
- your username and password will be emailed to you.
Once you have these, follow the instructions below.
Service-level agreement
By using the OMERO Demo Server, you agree to the following:
- You use this service at your own risk, and we provide NO GUARANTEE OR WARRANTY WHATSOEVER regarding uptime, security, data provenance or access, or any other service.
- You should not use the OMERO Demo server as a repository for any important data, or data that must be held in any secure or specific way.
- The responsibility for any data loaded onto the OMERO Demo Server is entirely your own.
- We reserve the right to remove any images, data, accounts or other data or structure without notice or request.
We welcome comments or ideas from your use of and experience with the OMERO Demo Server on the OMERO User discussion forum or ome-users mailing list.
Getting started with your demo account
To log on and try the demo server you have two options:
Download the OMERO.insight client for your platform, install it and run it as a stand-alone application. You will need to have permissions allowing you to install software on your computer, and you will need to update the client if the demo server is upgraded (we will email you to inform you).
The web client does not allow you to import data or create new ROIs.
Using the OMERO.insight client
Download the OMERO.insight client for your platform by clicking on the appropriate link on the downloads page.
After download, unzip and install the OMERO.insight client as you would for any other application.
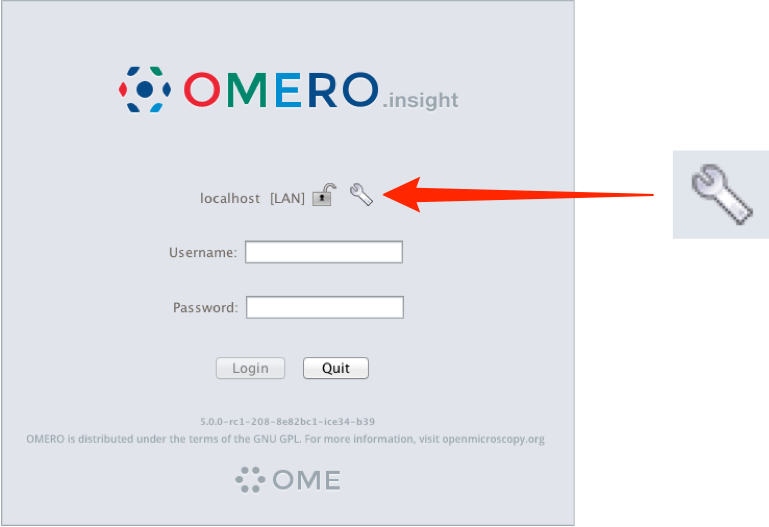
Launch OMERO.insight, and you will see the login screen.
Click the Spanner icon.
In the Servers window, click the + icon.
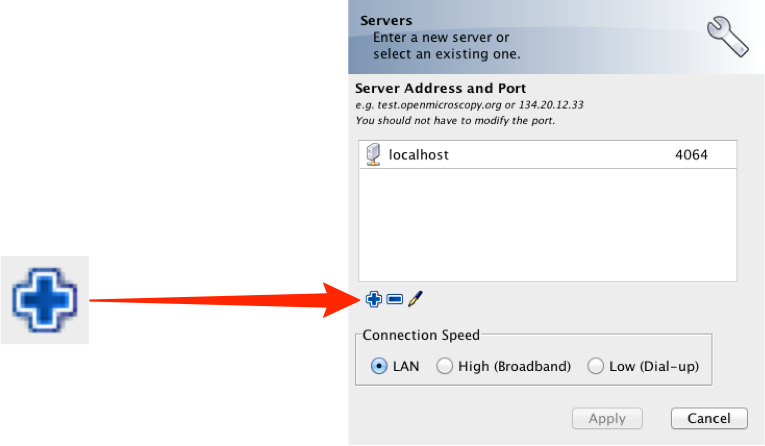
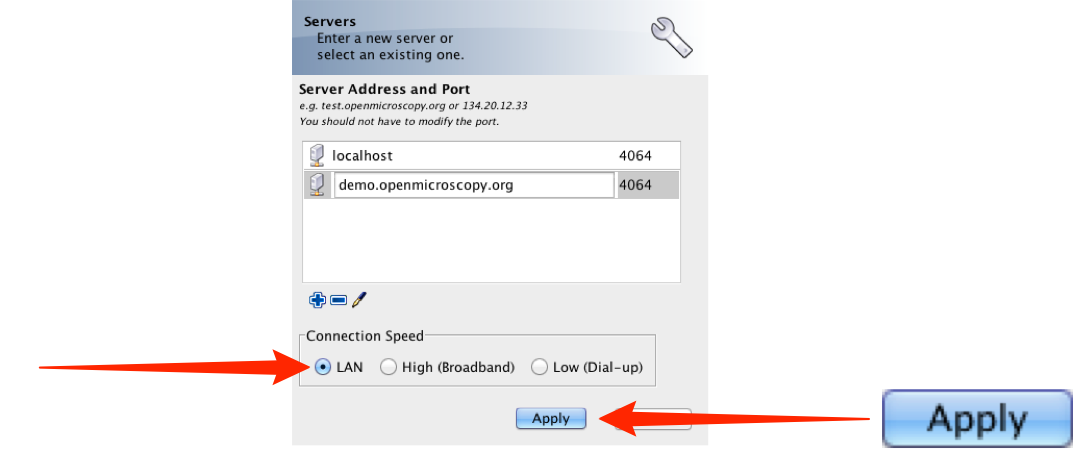
Enter the Server Address: demo.openmicroscopy.org
The port will automatically be set to 4064.
Select your network connection speed.
Click Apply
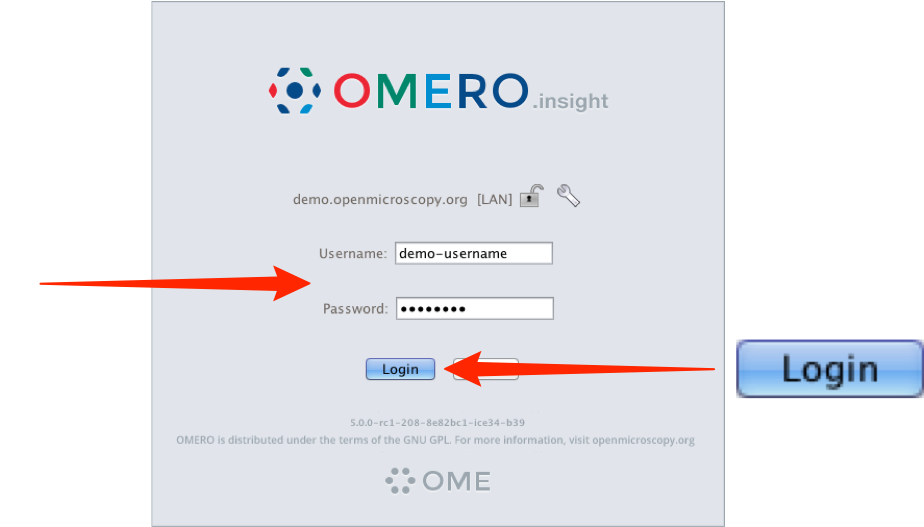
Enter the username and password provided.
Click Login
Using the OMERO.web client
To use the OMERO.web client click on the following link:
The server name is entered automatically, and you enter your demo account username and password as described above.
Please change your password as soon as you have logged in. The easiest way to do this is via: Web Admin
Further guides and help
Workflow-based user assistance guides are available on our help website. These use screenshots to illustrate how to perform common tasks such as importing and viewing data, and using the measurement tool.
An overview of some OMERO’s features is available in a short showcase video at:
If you have any questions, suggestions, comments or proposals, please take advantage of the OME community’s expertise and join our forums or mailing lists:
For more information on OME and OMERO please visit: