Note
This documentation is for the new OMERO 5.2 version. See the latest OMERO 5.1.x version or the previous versions page to find documentation for the OMERO version you are using if you have not upgraded yet.
OMERO virtual appliance
Note
As of OMERO 5.1.2, the Virtual Appliance is now available from a separate downloads page.
The OMERO virtual appliance is a quick, easy, and low-cost way to try out OMERO.server on your laptop or desktop. This enables you to make an informed decision about whether committing to an OMERO.server install is right for you.
Virtualization enables canned, ready to run software environments to be created and used, in the form of VM, or to be distributed for others to use, in the form of virtual appliances. A Virtual Appliance is essentially a file that describes how to create a new Virtual Machine on demand. The virtualized software environment can contain an entire OS, such as Windows or Linux, and any other software that runs in that OS, such as, in this case, OMERO.server and its associated software prerequisites. Once created and started, you can log into the OS and use it as though it were a real machine. One way to think of this is as though you had an entire computer in a window on your desktop.
When using virtualization software, the OS that is running the virtualization software is referred to as the “host OS”. When you use virtualization, the OS running within a virtual machine is referred to as the “guest OS”. This allows us to be explicit about which OS we are working in.
This technology allows the OME Project to distribute a canned, ready-to-run environment containing an OMERO.server, freeing you from having to install the server and prerequisites yourself, and letting you concentrate on evaluating the functionality of the OMERO platform.
Note
The virtual hard-drive used by the OMERO virtual appliance is 30GB in size and you should keep track of the amount of this space you have consumed and, if necessary, delete data that is not required. If your data is likely to exceed this space whilst you are evaluating OMERO then it is worthwhile going through the Increasing HD size before you start working with OMERO in earnest.
Getting started
To use the virtual appliance you should do the following:
- Install VirtualBox
- Download the OMERO.server virtual appliance
- Import the virtual appliance into VirtualBox to create a virtual machine
- Start the virtual machine
Each of these points is outlined in full detail below. Once you have everything installed, the virtual appliance should just work straight out of the box but if you have any problems, there is further guidance available for Troubleshooting OMERO virtual appliance and Working with OMERO virtual appliance.
Install VirtualBox
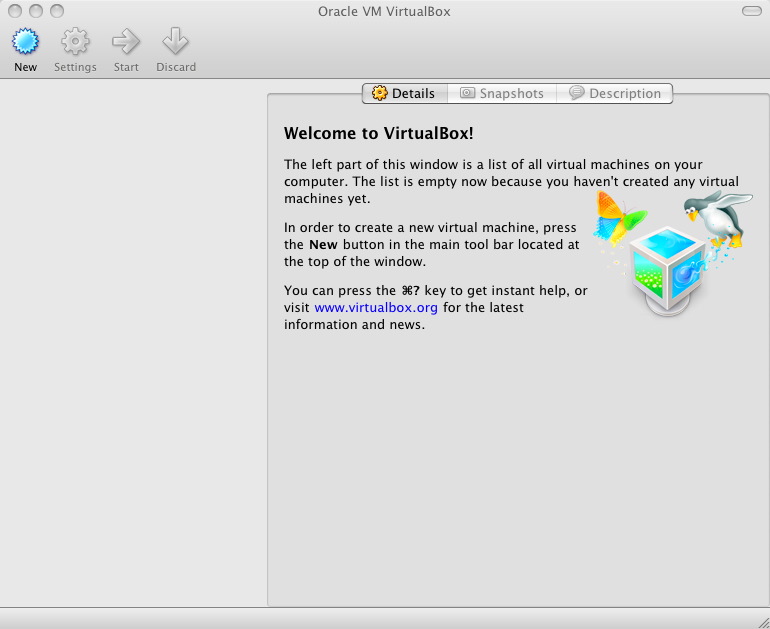
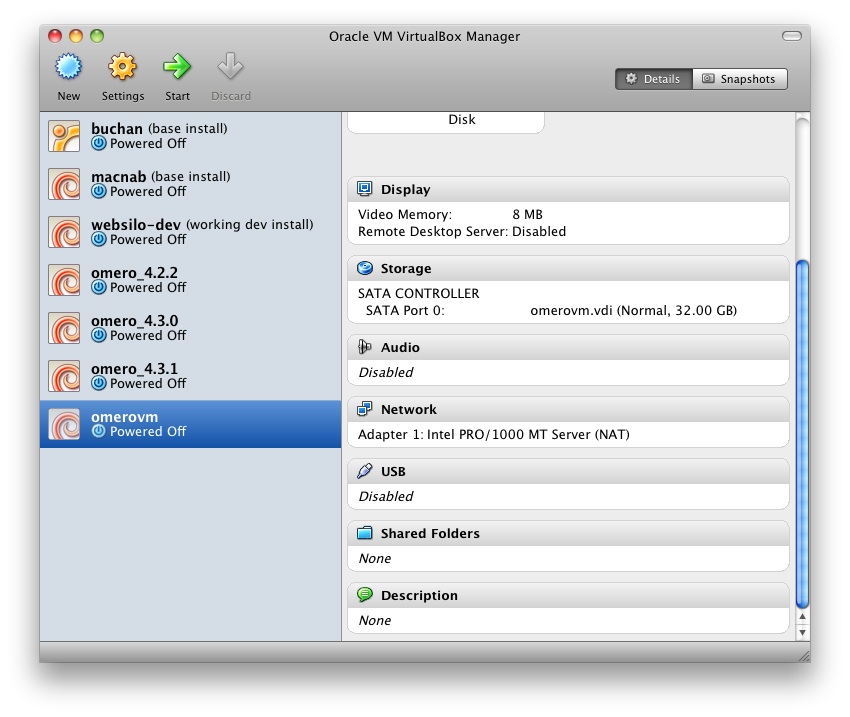
Download VirtualBox from the VirtualBox Downloads page and follow the installation process for your platform. If in doubt, you should download, or upgrade to, the latest version of VirtualBox. Once VirtualBox is installed, run the application. Depending upon your platform and version, the VirtualBox interface should look similar to the following screenshot:
Download the OMERO.server virtual appliance
The virtual appliance has its own download page and will have a filename similar to omero-va-5.2.1.ova.
Import OMERO virtual appliance into VirtualBox
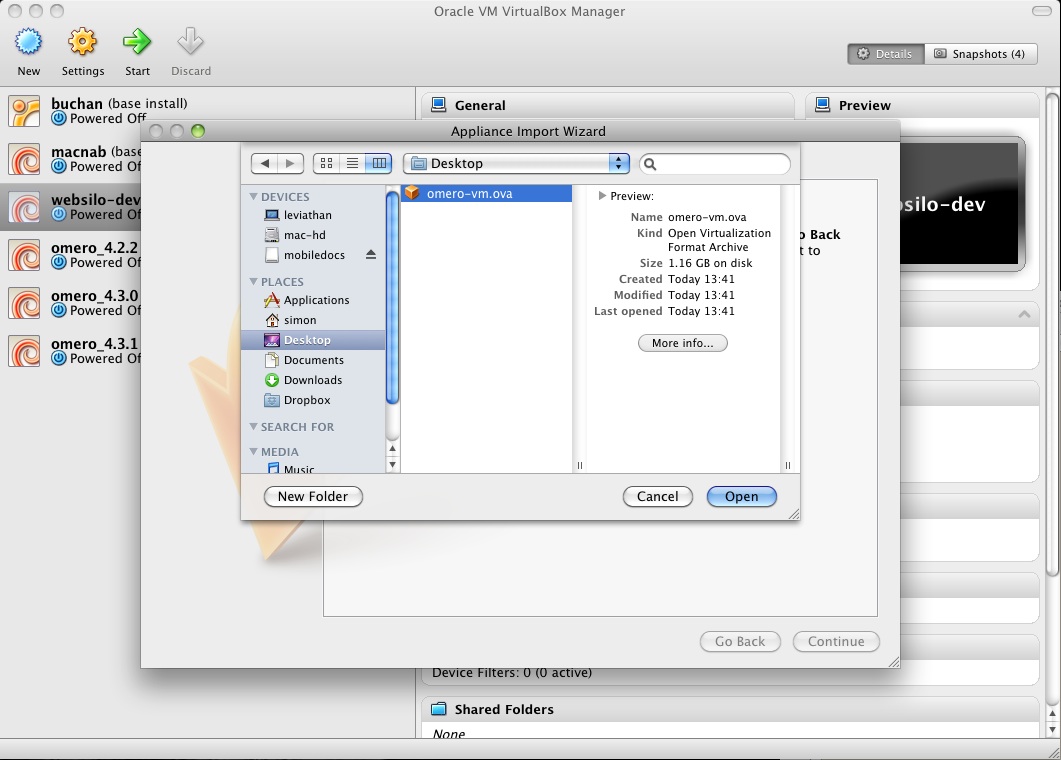
- Start VirtualBox then select ‘File/Import Appliance’. You will be presented with a dialog box.
- Select and navigate to the location where you downloaded the the virtual appliance file.
- Select your OVA file then click open.
This process is indicated in the screenshot below.
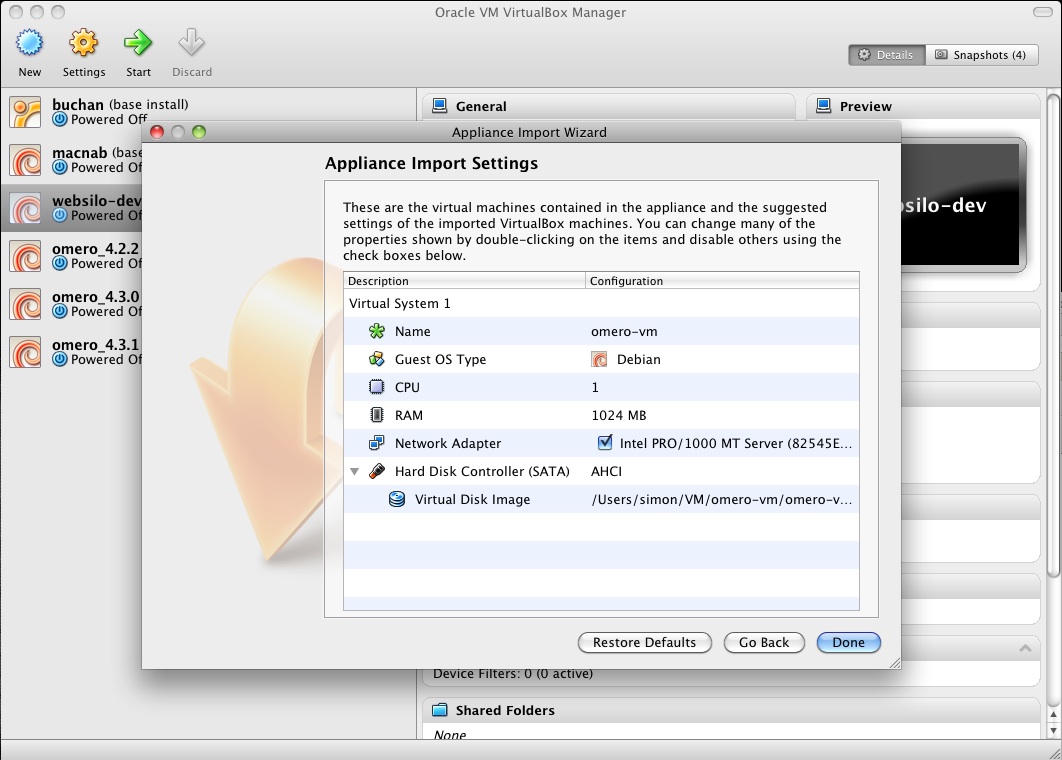
- Click continue. You will be presented with a range of options for the VM that will be built from the appliance.
- You can accept the defaults by clicking Import.
You should now see a progress bar as your new virtual machine is built from the appliance. This may take a few minutes depending upon your hardware.
When the import procedure is complete, your new VM should appear in the VirtualBox VM library ready for use.
Networking
Our virtual appliance is distributed with VirtualBox’s built in Host-Only Network Address Translation (NAT) preconfigured. This means that the IP address for the VM is 10.0.2.15 as this is the default VirtualBox Host-Only NAT address. Using this address is the simplest way to distribute a virtual appliance when you do not know the setup of a user’s network.
Port-forwarding settings
Your host OS cannot connect directly to 10.0.2.15 but needs to use port-forwarding. This means that you connect to your localhost on a specific port and the communications to and from that port are forwarded to specified ports on the guest VM.
Our virtual appliance should be preconfigured with the correct port-forwarding setting during the import process. However, it is best to double check that these settings are correct:
- Select your VM in the VirtualBox VM Library
- Click on Settings then select the Network tab
- Click on Advanced
- Click on Port Forwarding
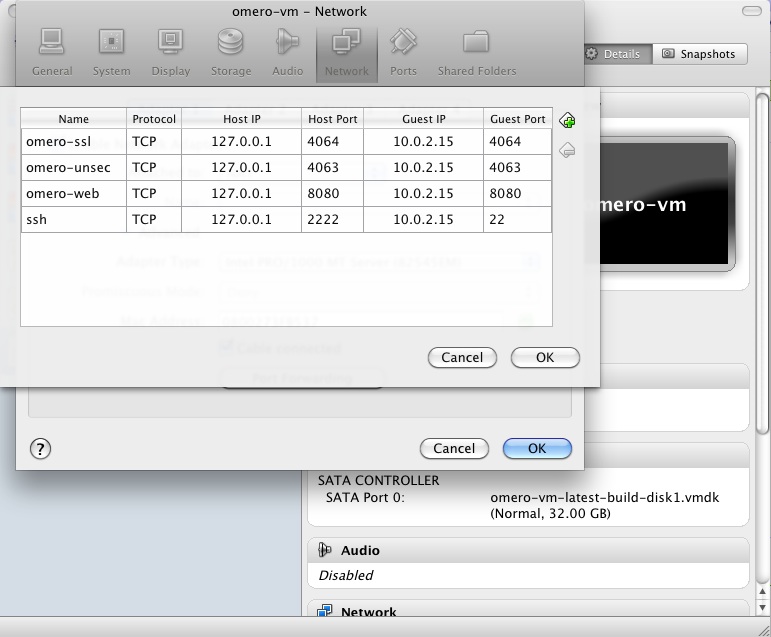
If the table in the window that appears is empty then port forwarding is not setup. The required port-forwarding settings are as follows:
| Name | Protocol | Host IP | Host Port | Guest IP | Guest Port |
|---|---|---|---|---|---|
| omero-ssl | TCP | 127.0.0.1 | 4064 | 10.0.2.15 | 4064 |
| omero-unsec | TCP | 127.0.0.1 | 4063 | 10.0.2.15 | 4063 |
| omero-web | TCP | 127.0.0.1 | 8080 | 10.0.2.15 | 8080 |
| ssh | TCP | 127.0.0.1 | 2222 | 10.0.2.15 | 22 |
When correctly setup in VirtualBox, your port forwarding settings should look like this:
If you are on Linux or Mac OS X, you can either use our port forwarding setup script or you can set up port forwarding manually.
On Microsoft Windows systems you will have to set up port forwarding manually as the script requires a Bash shell.
The script is in the file setup_port_forwarding.sh (click to view or download).
After obtaining the script, it can be used in the following manner:
$ bash setup_port_forwarding.sh $VMNAME
where $VMNAME is the name of your VM.
Note
By default the scripts create a VM named omerovm and the pre-built appliance is named omero-vm
Adding port forwarding manually is achieved by editing the port forwarding table shown above. Use the + to add a new row to the table, then click in each cell and type in the required settings.
Now you are ready to start your VM. Select the VM in the VirtualBox VM library then click start.
A window should open containing a console for your VM which should now be going through its standard boot process. OMERO.server is automatically started at boot time, meaning that you should be able to interact with OMERO without further setup.
Credentials
The following accounts are preconfigured in the OMERO virtual appliance: an OS account, for logging into the VM as the omero user, and a single OMERO.server account which is used to access the OMERO.server software as the OMERO.server root user.
Virtual Appliance OS credentials
| Username | Password |
|---|---|
| omero | omero |
A ‘root’ OS account is not needed as the omero account is able to run administrative commands via sudo with no password required.
OMERO.server credentials
| Username | Password |
|---|---|
| root | omero |
You can use this administrative account to create as many user level accounts as you require in the usual way.
Using the virtual appliance
Further guidance on how to interact with the server and troubleshoot common issues is available. See Working with OMERO virtual appliance and Troubleshooting OMERO virtual appliance. In particular, increasing the base memory allocation may significantly improve import performance.
