Note
This documentation is for the new OMERO 5.1. version. See the latest OMERO 5.0.x version or the previous versions page to find documentation for the OMERO version you are using if you have not upgraded yet.
Writing page templates in OMERO.web
This page documents the various base templates that are used by the webclient and describes how to extend these to create your own pages with the OMERO.web look and feel.
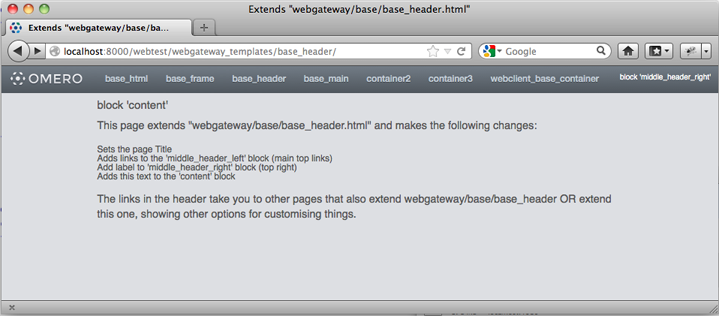
The base_header.html template extended in webtest with dummy content
You can use these templates in a number of ways, but there are 2 general scenarios that are detailed below:
- You want a page header to look like the webclient, but you do not need any data or connection to an OMERO server.
- You want a page that looks and behaves like it is part of the webclient application, including data from the OMERO server.
Django templates
We use Django templates for the OMERO.web pages. See docs here: templates and template inheritance. We have designed a number of OMERO.web base templates that you can extend. The base templates live in the ‘webgateway’ app under omeroweb/webgateway/templates/webgateway/base. You can use these to make pages that do not require an OMERO login (e.g. public home page) etc.
If you want your pages to extend the webclient application, you can use templates from omeroweb/webclient/templates/webclient/base.
These templates are described in more detail below.
Getting Started
Within your OMERO web app, create a new page template and add this line at the top:
{% extends "webgateway/base/base_header.html" %}
Now add the page content in a ‘content’ block like this:
{% block content %}
    Your page content goes here
{% endblock %}
You can now save this template and view the page. It should look something like the screen-shot above. You could add a ‘title’ block to set the page <title>
{% block title %}
    My OMERO web app page
{% endblock %}
Additional blocks can be used to customize the page further. See below for more details.
Using Webclient templates
Webclient templates can be used in exactly the same way, for example try using this at the top of the page you created above:
{% extends "webclient/base/base_container.html" %}
However, this template will need various pieces of data to be in the page context that Django uses to render the page. You will need to use the @login_required() and @render_response() decorators on your views.py methods in order to retrieve this info and pass it to the template. See Writing OMERO.web views for more details.
If you have used the ‘content’ block on this page (as described above) you will see that your page content fills the whole area under the header. However, if you want to use the same 3 column layout as the webclient, you can replace your ‘content’ block with:
{% block left %}
    Left column content
{% endblock %}

{% block center %}
    Center content
{% endblock %}

{% block right %}
    Right column content
{% endblock %}
This should give you something like the screen-shot below.
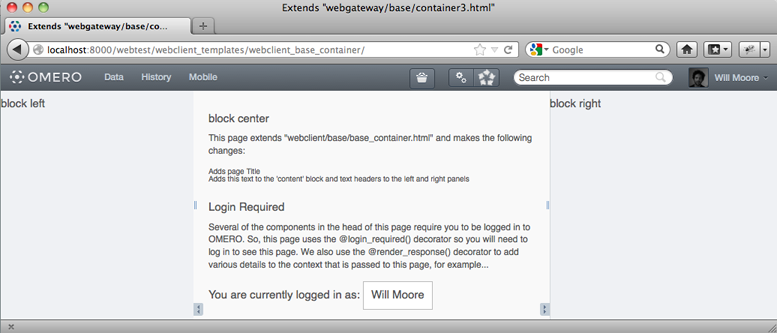
The webclient/base/base_container.html template extended in webtest with dummy content
Extending templates
You should aim to create a small number of your own base templates, extending the OMERO.web webgateway or webclient templates as required. If you extend all of your own pages from a small number of your own base templates, then you will find it easier to change things in future. For example, any changes in our ‘webgateway’ templates will only require you to edit your own base templates.
Here is a full list of the templates under omeroweb/webgateway/templates/webgateway/base with more details below:
- base_html.html - This provides the base <html> template with blocks for ‘link’(for CSS) ‘title’ ‘script’ and ‘body’. It is extended by every other template. Usage: {% extends "webgateway/base/base_html.html" %}
- base_frame.html - This adds jQuery and jQuery-ui libraries to a blank page. Used for popup windows etc. Usage: {% extends "webgateway/base/base_frame.html" %}
- base_header.html - This also extends base_html.html adding all the header and footer components that are used by the webclient. See screen-shot above. More details below.
- base_main.html - This adds jQuery and jQuery-ui libraries to the base_header.html template. Used for popup windows etc. Usage: {% extends "webgateway/base/base_main.html" %}
- container2.html, container3.html - These templates extend the base_header.html template, adding a 2 or 3 column layout in the main body of the page. container3.html is used by the webclient for the base_container example above.
Webtest examples
You can find examples of how to extend the base templates in the webtest application within the webtest/templates/webtest/webgateway directory. If you install the webtest app, you can view the template examples live at <your-server-name>/webtest/webgateway_templates/base_header/>
The link is to an example that extends base_header.html and contains links to all the other webtest examples. These pages indicate the names of the various template “blocks” that have been used to add content to different parts of the page (also see below for block names).
Content blocks
These blocks can be used to add content to specific points in the page.
Note
It is important to consider using {{ block.super }} if you want to include the content from the parent template. This is critical for the “link” and “script” blocks, which are used to add <link> and <script> elements to the head of the page. If you forget to use `` {{ block.super }} `` then you will remove all the CSS and JavaScript links required by the parent template.
See base_header.html for full template details.
link: used to add CSS with <link> blocks to the page head e.g.
{% block link %}
    {{ block.super }}
    <link rel="stylesheet" type="text/css"
         href="{% static "webgateway/css/ome.body.css" %}"/>
{% endblock %}
script - used to add JavaScript with <script> blocks to the page head
title - add text here for the page <title>.
head - another block for any extra head elements
middle_header_right - add content to the right of the main header
middle_header_left - add content to the left of the main header
content - main page content.
container2.html, container3.html
These templates have all the same blocks as base_header.html since they extent it (see above). In addition, they also add the following blocks:
- left: The left column (NOT in container2.html)
- center: The middle column
- right: The right column
See container3.html for full template details.