OMERO virtual appliance
The OMERO virtual appliance is a quick, easy, and low-cost way to try out OMERO.server on your laptop or desktop. This enables you to make an informed decision about whether committing to an OMERO.server install is right for you.
Virtualization enables canned, ready to run software environments to be created and used, in the form of VM, or to be distributed for others to use, in the form of virtual appliances. A Virtual Appliance is essentially a file that describes how to create a new Virtual Machine on demand. The virtualized software environment can contain an entire OS, such as Windows or Linux, and any other software that runs in that OS, such as, in this case, OMERO.server and its associated software prerequisites. Once created and started, you can log into the OS and use it as though it were a real machine. One way to think of this is as though you had an entire computer in a window on your desktop.
When using virtualization software, the OS that is running the virtualization software is referred to as the “host OS”. When you use virtualization, the OS running within a virtual machine is referred to as the “guest OS”. This allows us to be explicit about which OS we are working in.
This technology allows the OME Project to distribute a canned, ready-to-run environment containing an OMERO.server, freeing you from having to install the server and prerequisites yourself, and letting you concentrate on evaluating the functionality of the OMERO platform.
Note
The virtual hard-drive used by the OMERO virtual appliance is 30GB in size and you should keep track of the amount of this space you have consumed and, if necessary, delete data that is not required. If your data is likely to exceed this space whilst you are evaluating OMERO then it is worthwhile going through the Increasing HD size before you start working with OMERO in earnest.
Getting started
To use the virtual appliance you should do the following:
- Install VirtualBox
- Download the OMERO.server virtual appliance
- Import the virtual appliance into VirtualBox to create a virtual machine
- Start the virtual machine
Each of these points is outlined in more detail below.
Install VirtualBox
Download VirtualBox from the VirtualBox Downloads page and follow the installation process for your platform. If in doubt, you should download, or upgrade to, the latest version of VirtualBox. Once VirtualBox is installed, run the application. Depending upon your platform and version, the VirtualBox interface should look similar to the following screenshot:
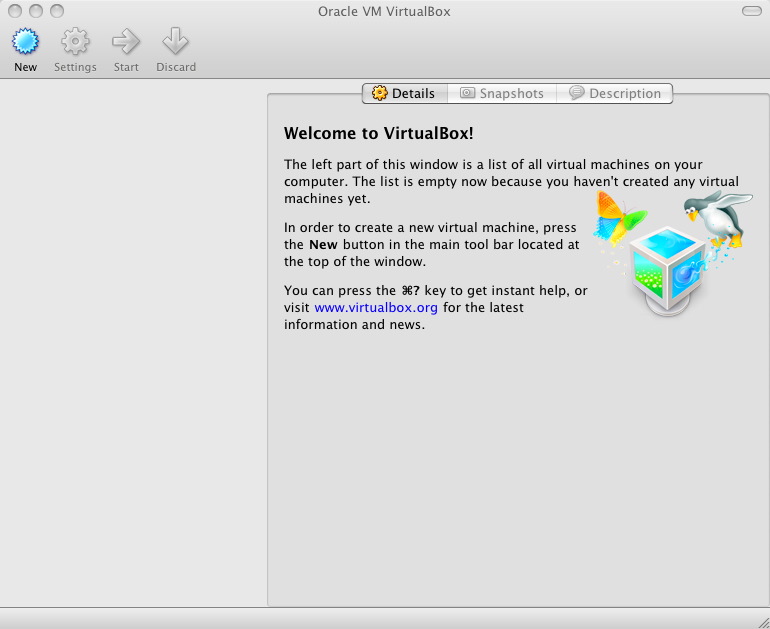
VirtualBox installation
Download the OMERO.server virtual appliance
The virtual appliance can be downloaded from the OMERO download page and should have a filename similar to omero-vm-5.0.0-rc2.ova.
Import OMERO virtual appliance into VirtualBox
- Start VirtualBox then select ‘File/Import Appliance’. You will be presented with a dialog box.
- Select and navigate to the location where you downloaded the the virtual appliance file.
- Select your OVA file then click open.
This process is indicated in the screenshot below.
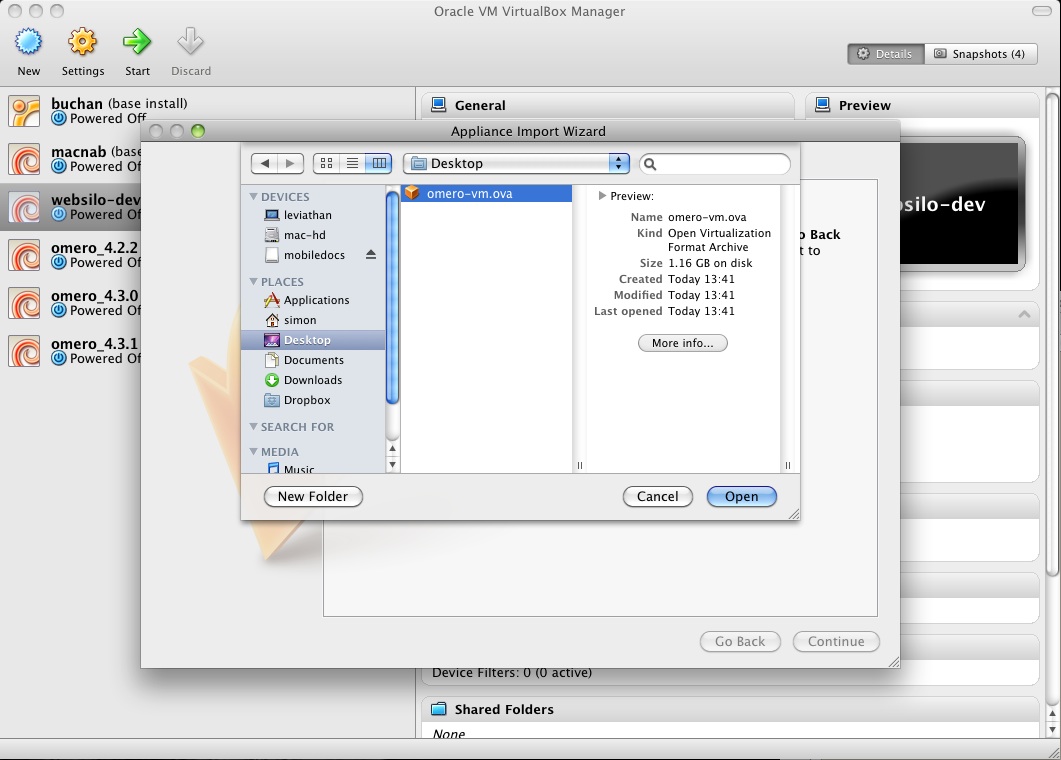
Import of the OMERO virtual appliance
- Click continue. You will be presented with a range of options for the VM that will be built from the appliance.

Virtual appliance import settings
- You can accept the defaults by clicking Import.
You should now see a progress bar as your new virtual machine is built from the appliance. This may take a few minutes depending upon your hardware.
When the import procedure is complete, your new VM should appear in the VirtualBox VM library ready for use.
Networking
Our virtual appliance is distributed with VirtualBox’s built in Host-Only Network Address Translation (NAT) preconfigured. This means that the IP address for the VM is 10.0.2.15 as this is the default VirtualBox Host-Only NAT address. Using this address is the simplest way to distribute a virtual appliance when you do not know the setup of a user’s network.
Port-forwarding settings
Your host OS cannot connect directly to 10.0.2.15 but needs to use port-forwarding. This means that you connect to your localhost on a specific port and the communications to and from that port are forwarded to specified ports on the guest VM.
Our virtual appliance should be preconfigured with the correct port-forwarding setting during the import process. However, it is best to double check that these settings are correct:
- Select your VM in the VirtualBox VM Library
- Click on Settings then select the Network tab
- Click on Advanced
- Click on Port Forwarding
If the table in the window that appears is empty then port forwarding is not setup. The required port-forwarding settings are as follows:
| Name | Protocol | Host IP | Host Port | Guest IP | Guest Port |
|---|---|---|---|---|---|
| omero-ssl | TCP | 127.0.0.1 | 4064 | 10.0.2.15 | 4064 |
| omero-unsec | TCP | 127.0.0.1 | 4063 | 10.0.2.15 | 4063 |
| omero-web | TCP | 127.0.0.1 | 8080 | 10.0.2.15 | 8080 |
| ssh | TCP | 127.0.0.1 | 2222 | 10.0.2.15 | 22 |
When correctly setup in VirtualBox, your port forwarding settings should look like this:
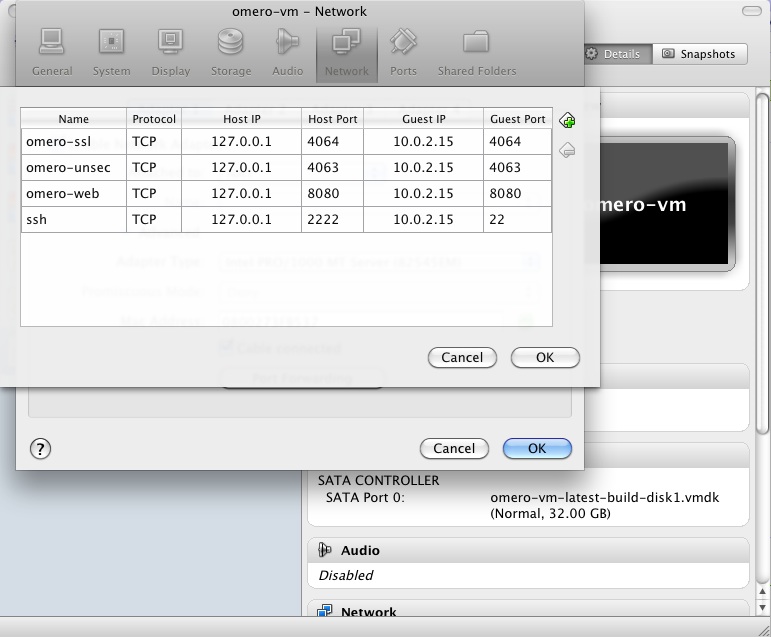
VirtualBox port forwarding
If you are on Linux or Mac OS X, you can either use our port forwarding setup script or you can set up port forwarding manually.
On Microsoft Windows systems you will have to set up port forwarding manually as the script requires a Bash shell.
The script is in the file setup_port_forwarding.sh (click to view or download).
After obtaining the script, it can be used in the following manner:
$ bash setup_port_forwarding.sh $VMNAME
where $VMNAME is the name of your VM.
Note
By default the scripts create a VM named omerovm and the pre-built appliance is named omero-vm
Adding port forwarding manually is achieved by editing the port forwarding table shown above. Use the + to add a new row to the table, then click in each cell and type in the required settings.
Now you are ready to start your VM. Select the VM in the VirtualBox VM library then click start.
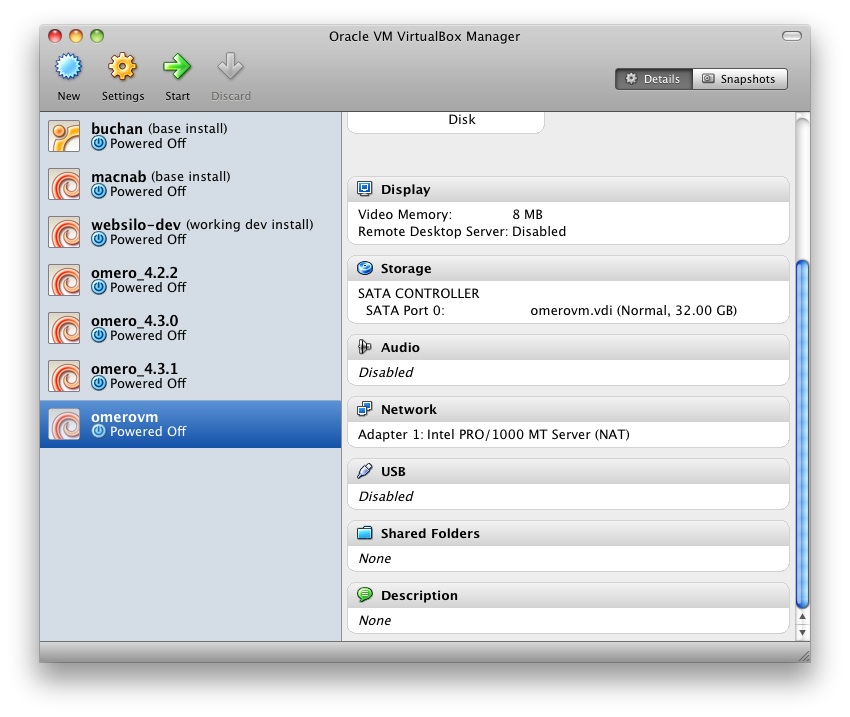
VirtualBox VM manager
A window should open containing a console for your VM which should now be going through its standard boot process. OMERO.server is automatically started at boot time, meaning that you should be able to interact with OMERO without further setup.
Booting the virtual appliance
Credentials
There are a number of accounts that are preconfigured in the OMERO virtual appliance. Two of these are OS accounts, for logging into the VM as either the root user or the omero user. There is also a single OMERO.server account which is used to access the OMERO.server software as the OMERO.server root user.
Virtual Appliance OS credentials
| Username | Password |
|---|---|
| root | [1] |
| omero | omero |
[1] The omero account is able to run administrative commands via sudo with no password required.
OMERO.server credentials
| Username | Password |
|---|---|
| root | omero |
You can use this administrative account to create as many user level accounts as you require in the usual way.
Working with the OMERO.VM
Now that your VM is up and running you have a choice about how to interact with it.
- You can connect to OMERO.web from your host browser. Go to http://localhost:8080/webclient.
- You can use OMERO.clients from within your host OS. This will allow you to import data via a GUI and manage that data once imported. To do so, download the OMERO.insight client and follow the instructions below. More information can be found on our help website which provides workflow-based guides to using the OMERO.clients.
- Alternatively, you can interact with the server command line interface by SSH‘ing into the guest VM or by opening a console within the VM itself. Administrators may need to use one of these methods to restart the server and/or change configuration parameters. In this case, you must have an SSH client installed on your host machine to use to connect to the OMERO.server.
Note
The following examples assume that the OMERO VM is up and running on the same machine that you are working on.
OMERO.web
Go directly to http://localhost:8080/webclient to log in with user: “root” / pw: “omero”.
Note
If you receive a 502 nginx error on first attempting to connect to the web app on http://localhost:8080/webclient/ please restart the virtual machine and try again.
OMERO.insight
You can run regular OMERO clients on your host machine and connect to the server in the VM. Our example uses OMERO.insight running on Mac OS X to connect to the VM.
- Download and install OMERO.insight
- Start OMERO.insight
- Click the spanner icon situated above the password box to enter the server settings box shown below.
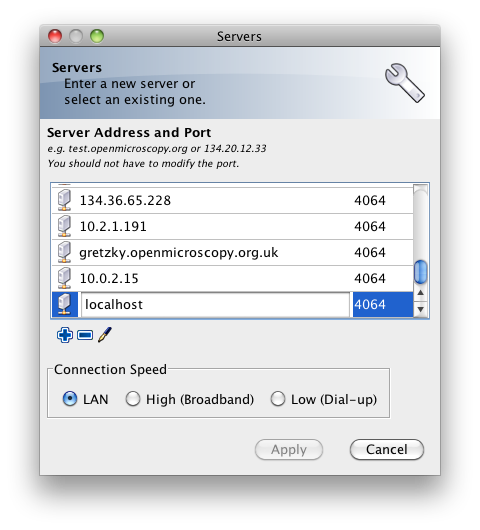
Setting OMERO.insight server address and port number
- Use the + icon to add a new server entry with the address localhost and the port 4064 then click apply
- You can now use the login credentials given above to log into OMERO.insight using the login window shown below (user: “root” / pw: “omero”).
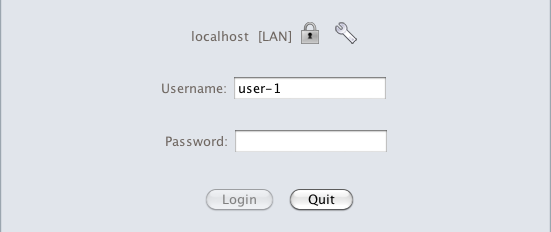
OMERO.insight login window
- OMERO.insight should now load up and display the main window.
You can now use OMERO.insight to import and manage images on a locally running virtual server just like you would use the standard remote server.
Note
A Getting Started guide is available for OMERO.insight on our help website if you need further assistance to download and install the software.
Secure Shell
You can log into your VM using SSH, allowing you to use the OMERO Command Line Interface. In the following example, we assume that you have an SSH client installed on your host machine and also that your VM is up and running.
You can log into the VM using the above credentials and the following command typed into a terminal:
$ ssh omero@localhost -p 2222
This invokes the SSH program telling it to login to the localhost on port 2222 using the username omero. Remember that earlier you set up port forwarding to forward port 2222 on the host machine to port 22 (the default SSH port) on the guest VM. You should be prompted for a password. Once you have successfully entered your password, you should be greeted by a prompt similar to the following:
omero@omerovm:~$
There are two potential complications to this method, (1) if you have used a VM before then there could be old SSH fingerprints set up, (2) the first time that you log into the VM you will be asked to confirm that you wish to continue connecting. If you get the following message after you invoke SSH, you need to remove the old fingerprints:
@@@@@@@@@@@@@@@@@@@@@@@@@@@@@@@@@@@@@@@@@@@@@@@@@@@@@@@@@@@
@    WARNING: REMOTE HOST IDENTIFICATION HAS CHANGED!     @
@@@@@@@@@@@@@@@@@@@@@@@@@@@@@@@@@@@@@@@@@@@@@@@@@@@@@@@@@@@
IT IS POSSIBLE THAT SOMEONE IS DOING SOMETHING NASTY!
Someone could be eavesdropping on you right now (man-in-the-middle attack)!
It is also possible that the RSA host key has just been changed.
The fingerprint for the RSA key sent by the remote host is
60:e0:d2:e8:fb:25:bf:09:53:9d:9d:59:59:45:cf:aa.
Please contact your system administrator.
Add correct host key in /Users/rleigh/.ssh/known_hosts to get rid of this message.
Offending key in /Users/rleigh/.ssh/known_hosts:14
RSA host key for localhost has changed and you have requested strict checking.
Host key verification failed.
You can do this using the following command typed into the terminal:
$ ssh-keygen -R [localhost]:2222 -f ~/.ssh/known_hosts
This should produce output similar to:
$ ssh-keygen -R [localhost]:2222 -f ~/.ssh/known_hosts
/Users/rleigh/.ssh/known_hosts updated.
Original contents retained as /Users/rleigh/.ssh/known_hosts.old
The first time that you log into the VM you will also be asked to confirm that you wish to connect to this machine by a message similar to the following:
$ ssh omero@localhost -p 2222
The authenticity of host '[localhost]:2222 ([127.0.0.1]:2222)' can't be established.
RSA key fingerprint is 60:e0:d2:e8:fb:25:bf:09:53:9d:9d:59:59:45:cf:aa.
Are you sure you want to continue connecting (yes/no)?
You should confirm that you wish to continue connecting, after which you will be prompted for your password as usual:
Are you sure you want to continue connecting (yes/no)? yes
Warning: Permanently added '[localhost]:2222' (RSA) to the list of known hosts.
omero@localhost's password:
After which, you should have a prompt indicating that you have a shell open and logged into the VM:
omero@localhost's password:
Linux omerovm 2.6.32-5-686 #1 SMP Mon Jun 11 17:24:18 UTC 2012 i686

The programs included with the Debian GNU/Linux system are free software;
the exact distribution terms for each program are described in the
individual files in /usr/share/doc/*/copyright.

Debian GNU/Linux comes with ABSOLUTELY NO WARRANTY, to the extent
permitted by applicable law.
Last login: Thu Apr  5 10:32:18 2012 from 10.0.2.2
omero@omerovm:~$ _
Log into the VM directly
Note
Due to the frequent changes in the VirtualBox Guest Additions, key mappings between the host and guest OS do not always work. We recommend using SSH as the primary way of interacting with the Virtual Appliance CLI.
When you start your VM using the VirtualBox GUI, as outlined above, a window will be displayed showing the boot process for the machine as it starts up, just like with a real piece of hardware. Once the boot process has finished you will see a prompt displayed in this window like so:
[System startup messages]

Debian GNU/Linux 6.0 omerovm tty1

omerovm login: _
You can log into the console of the VM directly using the user account credentials above.
omerovm login: omero
Password: _
There is no GUI on the current OMERO virtual appliance so you will have to use the Bash shell which looks like this:
omero@omerovm:~$ _
From here you can interact with OMERO.server via the OMERO Command Line Interface. You will need to login as the ‘omero’ user to access the OMERO CLI (user: “omero” / pw: “omero”). Logout using Ctrl-D.
Known issues
Networking not working
Occasionally, during the boot process, the VirtualBox DHCP server fails to allocate an IP address to the OS in the guest VM. This means that OMERO.clients, such as OMERO.insight, cannot connect to the OMERO.server in the VM.
CAUSE: We believe that this is an intermittent VirtualBox bug that resurfaces across many versions VirtualBox #4038 and previously VirtualBox #3655
DIAGNOSIS: Check whether the guest VM has been allocated the reserved host-only NAT IP address. If 10.0.2.15 does not appear in the output from ifconfig then this issue has occurred. The easiest way to verify this is to log into the guest VM console and check the output from executing the following command:
$ ifconfig
SOLUTION: An easy, but unreliable, fix is to reboot the guest VM. The preferred fix is to log into the guest VM console and execute the following commands, which will cause the guest OS to release its IP lease before requesting a new lease:
$ dhclient -r
$ dhclient -eth0
Port conflict when OMERO.server already running in Host OS
If you are already running an instance of the OMERO.server in your host OS then there will be a conflict due to the ports assigned to VirtualBox port-forwarding already being in use.
SOLUTION 1: Turn off the OMERO.server in the host environment by issuing the following command:
$ omero admin stop
SOLUTION 2: Alter the port-forwarding settings for your OMERO.VM as described in the Port-forwarding settings section. For example, increment the host port settings for omero-ssl, omero-unsec, and omero-web.
Note
We are assuming that your host OS is not already running services on those ports. You can check whether something is already listening on any of these ports by running the following commands (Mac OS X) which should return the prompt without any further output if there is nothing listening:
$ lsof -nP | grep -E '(:4063)|(:4064)'
VM will not boot because the HDD is full
If you fill the virtual HDD used by your VM then the OS may be unable to boot and you will lose access to your OMERO.server install. You may also get a “error 28: no space left on device” message. To log into your VM you will need to use the recovery mode. Start the VM and at the Grub screen, use the down arrow followed by return to select the recovery mode entry, e.g.
Debian GNU/Linux, with Linux 2.6.32-5-686 (recovery mode)
as illustrated in this example of the Grub screen:
                 GNU GRUB  version 1.98+20100804-14
┌────────────────────────────────────────────────────────────────────────┐
│Debian GNU/Linux, with Linux 2.6.32-5-686                               │
│Debian GNU/Linux, with Linux 2.6.32-5-686 (recovery mode)               │
│                                                                        │
│                                                                        │
│                                                                        │
│                                                                        │
│                                                                        │
│                                                                        │
│                                                                        │
│                                                                        │
│                                                                        │
│                                                                        │
│                                                                        │
└────────────────────────────────────────────────────────────────────────┘
Do not worry if your VM has a kernel number different to 2.6.32-5-686, the important thing is that you select the entry labeled “recovery mode”. At this point, the VM should rapidly boot into the recovery mode and enable you to log in as the omero user. Administrative commands may be run as root by using sudo.
Once you have logged in, you have a number of options but the recommended courses of action are:
- Delete unnecessary files using standard Linux command line tools like rm to make space for the VM to boot normally, then use your favored OMERO client to login and delete more files. A useful place to start might be by deleting the logs stored in /var/logs.
- Increase the size of your virtual HDD. If you have filled your existing HDD then it is likely that the volume of data you are storing is too big for the default HDD. You should follow the instructions in the Increasing HD size section to ensure that the size of virtual HDD you have available is suitable for the volumes of data that you are collecting.
Increasing HD size
Image data can become very large and easily fill available hard-drive space. By default, the OMERO virtual appliance is supplied with a 30GB virtual hard-drive. Before using the appliance, consider the volume of data you will be working with whilst evaluating OMERO and whether you need to increase the size of the virtual hard-drive to accommodate it.
The following is a step-by-step guide; be aware that this is not a risk-free procedure and you should backup your VM before proceeding.
Preliminary steps
Acquiring a Ubuntu Linux ISO
Download an Ubuntu Linux ISO. The most up-to-date version is fine.
Backing up your VM
Before you proceed further, you should create a clone of the omero-vm and subsequently work on the copy so that if something gets broken you can always start again. The easiest way to do this is from the command line.
Note
If you are on Windows then you should navigate to C:\Program Files\Oracle\VirtualBox\ because the VBoxManage tools are not added to your path by default.
Start a shell and, assuming that your VM has the default name of omero-vm, use the following command:
$ VBoxManage clonevm omero-vm --mode machine --options keepallmacs --name omero-vm-2 --register
This will create a copy of your VM called omero-vm-2 which you can make alterations to. This means that you can always return to the original omero-vm if you break anything. From now on only make changes to omero-vm-2.
Extending the HDD
By default, your virtual hard-drive attached to omero-vm-2 is of a type which cannot be extended; so you need to change this by cloning your HDD from the VDMK type to VDI type:
$ VBoxManage clonehd omero-vm-2-disk1.vmdk omero-vm-2-disk1.vdi --format VDI
You now need to increase the size of your virtual HDD. The following command resizes the HDD to 60GB but you should select a size to suit the amount of data you plan to store in OMERO:
$ VBoxManage modifyhd omero-vm-2-disk1.vdi --resize 60000
Adding the extended HDD to the VM clone
You now need to tell VirtualBox to use omero-vm-2-disk1.vdi instead of omero-vm-2-disk1.vmdk which is currently attached to the VM. Whilst you are on the Storage tab you will also attach the Ubuntu ISO that you downloaded earlier to your VM. This will allow you to use the tools that ship with Ubuntu to make changes to the filesystem within your VM.
- Start VirtualBox and select omero-vm-2 in the VM library.
- Right-click Settings then select the Storage tab.
- Right-click on omero-vm-2-disk1.vmdk and select Remove attachment.
- Next to the SATA Controller entry, click the Add Hard Disk icon with a green plus sign. In the pop-up dialog, select Choose existing disk. Now navigate to the location where VirtualBox stores your virtual machines and enter the omero-vm-2 directory. Select the omero-vm-2 disk1.vdi and click open.
- Add an IDE Controller using the Add Controller icon. Select this new controller then click Add CD/DVD device followed by Choose Disk. Navigate to the location of your Ubuntu ISO, select it and click OK.
The storage for your OMERO VM should now look similar to Virtual Appliance storage settings.
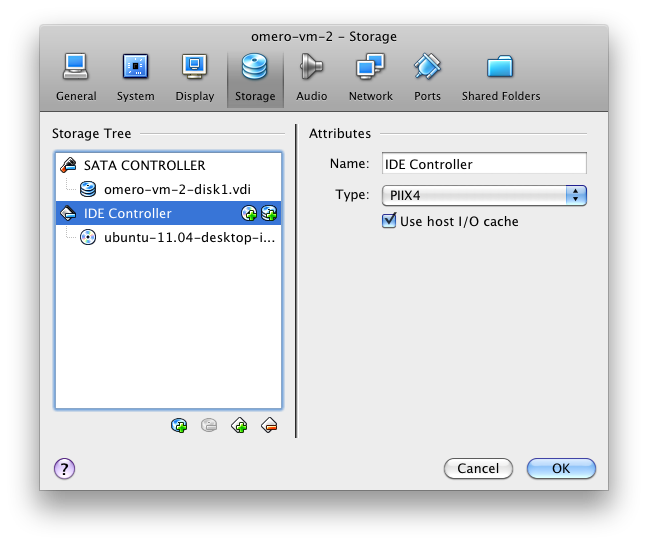
Virtual Appliance storage settings
Click OK to return to the VirtualBox VM library. With omero-vm-2 selected, ensure that the storage details match what you expect, e.g. omero-vm-2-disk1.vdi is connected to your SATA Port 0. The size for this disk should also more or less match what you specified earlier with the VBoxManage modifyhd command. The reported numbers do not exactly matchup, e.g. a virtualised HDD of 60GB size will be reported as 58.59GB.
Reallocating space on the VA HDD
Start the omero-vm-2 VM. Ubuntu linux should boot and you should eventually see a welcome screen giving you the option to try Ubuntu or to install it. You can now start the GParted software and resize your partitions.
- Select try Ubuntu and you should be presented with a graphical desktop.
- Start the gparted tool using the menu option under System ‣ Administration ‣ GParted Partition Editor.
- The GParted GUI will display information similar to Virtual Appliance HDD in GParted.
- Right-click the entry for /dev/sda5 and select Swapoff.
- Right click on /dev/sda5 and click Delete to remove the swap partition.
- Delete /dev/sda2 in the same way. This should leave two entries, one for /dev/sda1 and one for unallocated space.
- Right-click /dev/sda1 and select Resize. Now drag the right arrow to the right until the entry for Free space following (MiB) is about 2000, then click Resize/Move.
- Right click the entry for unallocated space and select New from the pop-up menu. Select linux-swap from the File system drop-down menu then Add.
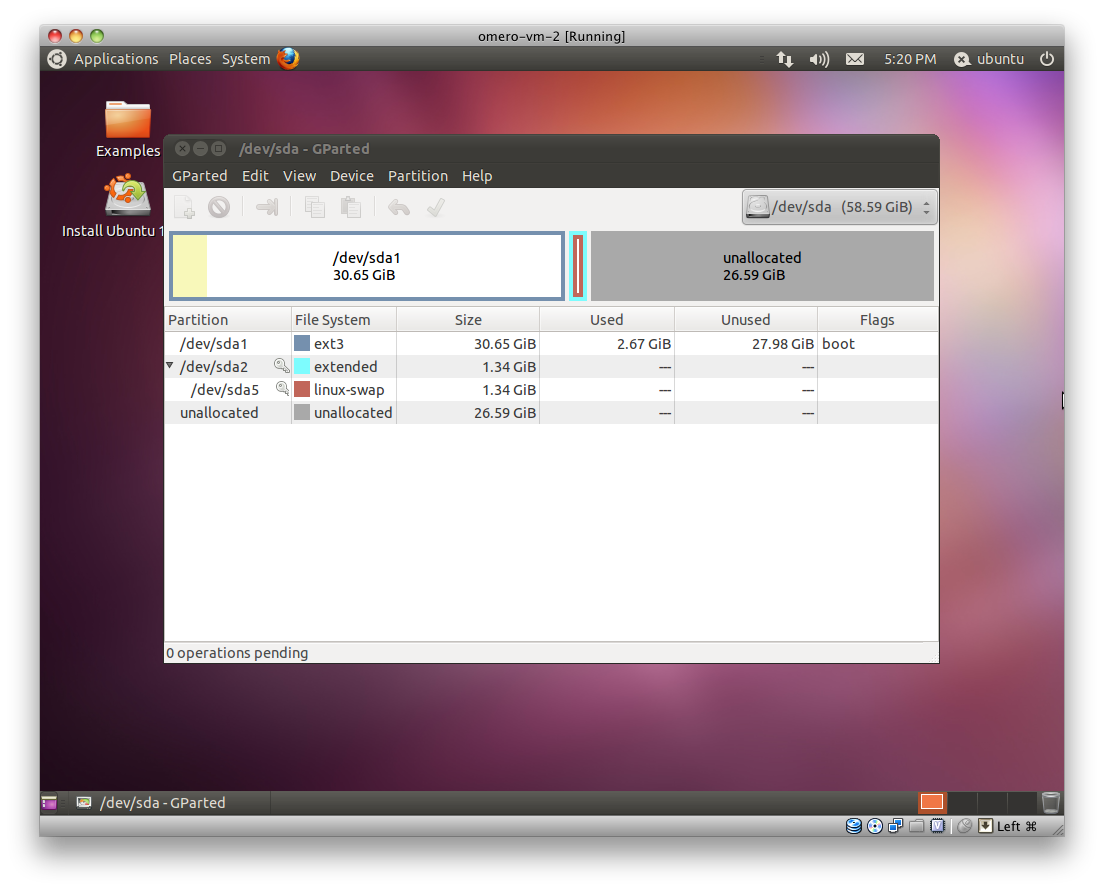
Virtual Appliance HDD in GParted
Up until this point you have not actually applied any of your changes to the HDD, you have only specified a list of changes that should be made. You can now go ahead and apply them by selecting the Edit ‣ Apply All Operations menu item, then clicking Apply in the confirmation dialog box.
When the operations have completed, dismiss the dialog with the Close button, close GParted, then shutdown the VM.
Changing HDD settings inside the VA
You no longer need the Ubuntu ISO so you can detach it from your VM. Ensure that omero-vm-2 is selected then click Settings and select the Storage tab. Right-click the IDE Controller entry and select Remove Controller, then click OK to return the VirtualBox VM library.
Start the omero-vm-2 VM and allow it to boot. As root then issue the df -h command. Verify that the size of the /dev/sda1 is approximately what you expect, e.g. if you allocated a 60GB virtual HDD then after size conversions and swap allocation you should end up with /dev/sda1 reported as being around 56GB.
Within the VM you need to add the UUID of the new swap partition to the /etc/fstab file because you deleted the old one and created a new swap meaning that the IDs will no longer match.
$ vim /etc/fstab
Move your cursor to the entry that looks similar to the following:
UUID=SOME-LONG-ALPHA-NUMERIC-STRING none swap sw 0 0
then press i to enter “insert mode”. Delete the alphanumeric string so that the entry looks similar to the following:
UUID= none swap sw 0 0
and place your cursor after the equals sign. You can now issue a command from within the VIM editor to insert your new swap UUID into the fstab file.
[Insert Mode] <CTRL-R> =system('/sbin/blkid -t TYPE=swap | cut -c18-53') <return>
Save your file and quit VIM:
[Command Mode] :wq <return>
Now reboot your VM with
$ shutdown -r now
Once your VM has rebooted you should now have a working VM with a larger virtual HDD.